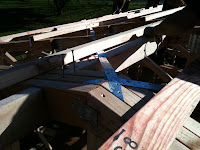
Today was purlin day. First thing was that we prepared the trusses with marks showing the location of where the purlin would sit (based on the spacings specified in the plan. These were scribed onto the trusses & also had a nail nailed into the area (so that the purlins could sit on the nails & stop it from sliding down the pitch of the roof). Once all marked out, the purlins could start being laid out along the length of the building & attached. From the apex of the building, the first measurement was 150mm on each side from the apex. The joins of the purlins were done so that there were no two joins adjacent from each other, or
on the same truss. When getting the purlins to the correct length so that it always fell on a truss where a join could be, the purlins were cut to length up on the roof when laid out. When it hit a truss where it could be cut, it was marked off to half the thickness of the rafter & then a hand saw was used to cut off at this mark. It was then secured down with 2/100x375.
 This process gave more control on dictating where joins would fall whilst making it easier to do as it gave more leeway & eliminated the chance of measurement errors (as apposed to cutting to length on the ground).
 As the purlins were being secured down, it was also really important that someone was at the gable end of the building, checking that it's alignment was ok. This was really important

 as the roof cladding relies on the purlins being straight so that there is a surface for them to be fixed on to.
Once they are all laid on to the trusses, there will be several overhanging lengths off the gable end truss, these are all cut to length so that they are flush with the outriggers on the overhangs of the building. Uplift fixings are then attached to the purlins, where 1x Z Wiredog was put on every point where a purlin met a truss, & 4 were attached where ever a join occurred on a truss.
The purlins were also important as they provided an extra support surface to hold the ladder frame securely to the gable end truss. This pre-nailed frame work was designed to cover the overhang & was attached by aligning it so that it was plumb with the gable end truss rafters. Once in position a clamp was used to hold it in place & then it was secured with 100x3.75 galvanised flat head nails.


Great post!
ReplyDeleteWhere would the steel roofing business be if it wasn't for roll forming machines? This industrial machines are capable of forming sheet metal in to some amazing profiles that are then used in some highly creative works of art.
Thanks for the post